devDiary 0.1: On the Origin of 3D
20 June 2025 at 02:14:30 pm NZSTOver the course of this dev diary I’ll walk through the process of creating 3D graphics from scratch. I’ll be creating a raycast renderer to draw a 3D environment with nothing but a buffer of pixels, and maths (rad right?).
3D graphics are so commonplace today that those of my generation take them for granted. We can create entire environments in the browser with WebGL, and photorealistic environments with recent breakthroughs in raytracing, and geometry systems like Nanite.
Wait, raytracing? I thought this was about raycasting? As a matter of fact, what’s the difference?
I can’t fault you for getting confused; both techniques are very similar, and have been around for quite a while now. Both techniques involve casting rays to generate 3D environments, but raytracing is generally more complex. Raycasting can create simple pseudo-3D (we’ll get to this) environments made of walls, ceilings, and floors; while raytracing is often used to simulate light. In raytracing, rays bounce off objects to illuminate a scene and produce shadows, highlights, and reflections. This series, however, is about raycasting.
How Did We Get Here?
Tracing the origin of 3D graphics leads us to Maze, a game developed at MIT in 1973, that used vector graphics to simulate 3D environments. Maze was revolutionary for its time, but was certainly a product of the technological landscape at its inception. The player’s view was restricted to the four cardinal directions, and the graphics were closer to a set of images mimicking depth than the result of live computations.
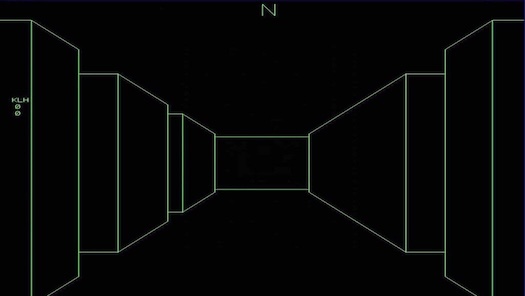 Maze (1973)
It’s not until Hovertank 3D (1991) that we find the first instance of raycasting in the wild. Legend John Carmack developed the game engine in six weeks, which would go on to power games Catacomb 3-D and the infamous Wolfenstein 3D.
How Does it Work?
Raycasting is a technique to render 3D environments from 2D data. A camera is positioned at a point in a Cartesian plane, enclosed within a series of walls along grid lines. One “ray” is cast (hence the name) for each pixel column of the display. These rays extend until they hit a wall. The length of the ray is calculated, which then corresponds to the height of the wall on the screen. Walls that are further away appear smaller, creating the illusion of depth. Because our data only stores information in two axes, raycasting is not truly 3D, and commonly referred to as 2.5D.
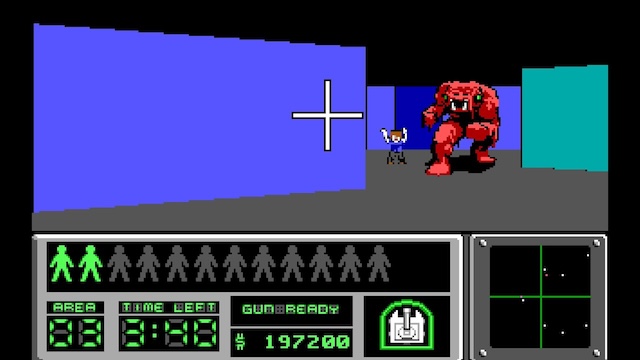 Hovertank 3D (1991)
The advantage of the raycasting approach is its efficiency, vital back when RAM was measured in kilobytes rather than gigabytes.
This isn’t without its drawbacks though. Raycasting works best with walls at 90-degree angles, and lacks any real ability to simulate height differences, like stairs or slopes.
What’s Coming
In this series of blog posts, I’ll be diving in depth on how raycasting works, and writing my own raycast renderer.
Stay tuned, or don’t, I’ll post anyway.